Yes, You Can Adjust the Temperature Control on Your NAPCO 704-9000D Autoclave
Just Follow The Directions Below
NAPCO 704-9000D Control Adjustments
Temp-Autoclave Control
The Temp-Autoclave Control may require adjustment. The function of this control is to maintain a
maximum stabilized temperature of 132°C (270°F). The control requires calibration to assure
that it is at the proper setting
To calibrate the control the following procedure should be followed:
- Check the water level and fill to gauge level
- Turn Function Switch to AUTOCLAVE ONLY. Turn Power Switch ON & Then Start The Timer
- Heat Unit to 132°C (270°F) by Adjusting the Temp-Autoclave Control Shaft
- To gain access to the Temperature Control Shaft, remove the knob by loosening the two set screws. The
slotted shaft can now be seen
- Turn the shaft counterclockwise to raise the temperature. Turn clockwise to lower the temperature
- Watch Temperature Gauge on door and adjust by 1/2 turn increments until temperature is reached
- Allow the unit to stablize. Watch the Temperature Gauge. The Temperature Light will flash off and on at intervals
holding the temperature within tolerance
- Adjust as necessary during the stablization time. Temperature Light should flash on each time there is a 1°
drop in temperature. When the unit has flashed several times the unit is stablized
- Place knob on temperature control shaft with indicator at position 7 and tighten both set screws
- Check operation of shaft and knob by turning to position 1 and back to position 7
Adjusting The Sensor
The sensor is set at the factory (near sea level) to close the Solenoid at 2°C above the boiling point of water.
Since the boiling point of water will vary with altitude the Sensor may need adjustment when setting up the unit at higher elevations.
Note the applicable temperature on the following chart..
BOILING TEMPERATURE OF WATER VS ALTITUDE
| Altitude (Meters) |
Temperature °C |
Altitude (Feet) |
Temperature °F |
| 0 |
100 |
0 |
212 |
| 150 |
99.5 |
1000 |
210.1 |
| 300 |
98.9 |
2000 |
208.3 |
| 600 |
97.9 |
3000 |
206.5 |
| 900 |
96.9 |
4000 |
204.6 |
| 1200 |
95.9 |
5000 |
202.8 |
| 1500 |
94.8 |
6000 |
201.0 |
| 2000 |
92.9 |
7000 |
199.3 |
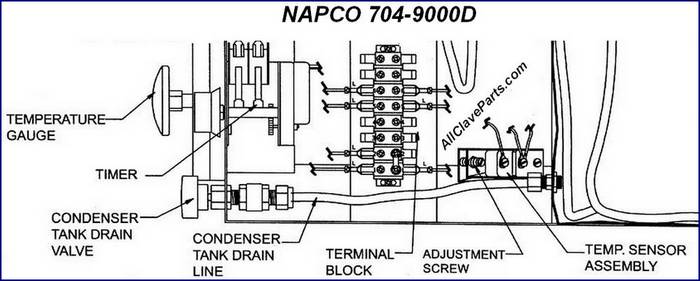
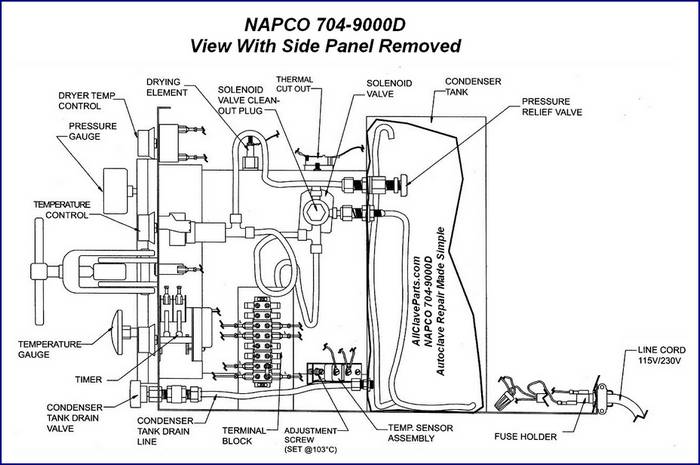
- See Illustration Below
- Set Temperature Autoclave Control on Position 4, turn Power Switch ON and activate Timer (Check Water Level
In Chamber Before Turning the Autoclave On
- Observe the temperature at which the Solenoid is activated. Listen for the first Click of the solenoid during warm-up
- If Sensor requires adjusment to 2°C above boiling point, locate adjustment screw at the end of the Sensor
CAUTION: the terminal next to the adjustment screw is Electrically Hot. Use insulated screwdrive to make adjustment
- Turn the Power Switch OFF and allow the unit to cool for 10 minutes
- Repeat Step 1 above and observe the Temperature Gauge
- When the predetermined Temperature is obtained (2°C above local boiling point of water) turn Sensor adjusting screw
counterclockwise until the Solenoid is activiated
- The autoclave should then be cooled and reactivated to activate the Solenoid again. This will confirm that the Sensor adjustment
is now correct

