How To Replace The Temperature Gauge On The Pelton Crane OCM & OCR Autoclaves
Replacing The Temperature Gauge on your OCM or OCR Autoclaves Is Pretty Straight Forward
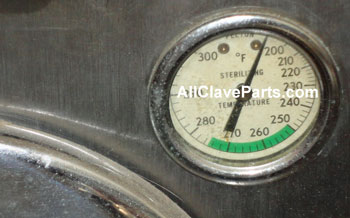
Before beginning, the first thing you will need to do is to remove the cabinet from the autoclave
Step 1: With The Cabinet Out of the Way, Start by Removing the Two Nuts from the Mounting Bracket on the Backside of the Temperature Gauge, turning the nuts counterclockwise with a 3/8" wrench. Shown in the Picture Below
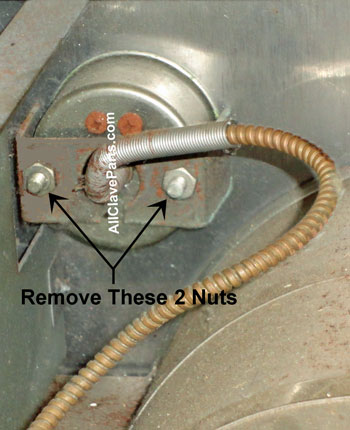 Step 2:
 Remove The Bracket By Pulling It Away From The Cabinet and Sliding It Off The Cable Through The Slot As Shown In The Picture Below
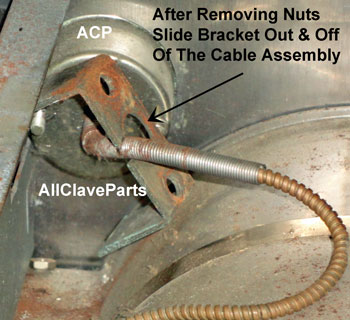 Step 3:
 Now Follow The Cable Back To The Housing Where the Temperature Probe is Located as Shown in the Picture Below And Remove The Nut By Turning It Counterclockwise with a 3/4" Wrench
 Step 4:
 Once The Nut has been removed, Simply Pull the Probe out of the Housing
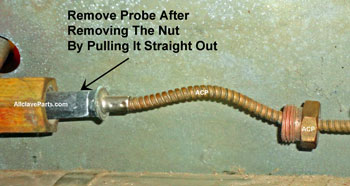 Step 5:
 Once the Probe Has Been Removed, Grab the Temperature Gauge and Pull The Entire Assembly Out Through The Front of The Autoclave
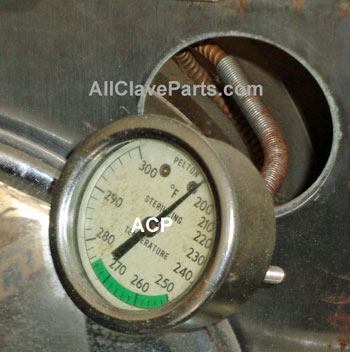
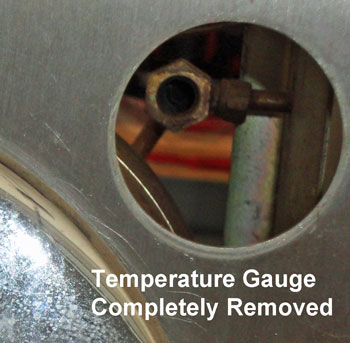
 Note:
Note: Sometimes the probe can be difficult to remove. If needed, try to spray something like WD40 into the housing that the probe sets in, and wait a few hours for it to penetrate. Be sure to clean out all of the WD 40 With Alcohol And Cotton Swabs Once The Probe Has Been Removed
In extreme cases, you may have to carefully drill the probe out
To Install the New Temperature Gauge Assembly, Starting With Step 5, Just Repeat The Steps Above in Reverse Order