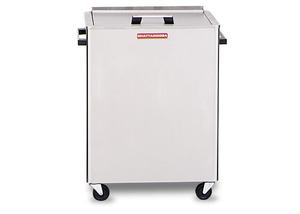
Description

Part #PCH023-103
Pelton Crane Part #014603
HEATING ELEMENT
- 1600W, 120V, ~9ohms
- Sheathing: Electrogalvanized Sheet Steel
- ~15" Long
- Includes Heating Element, Hardware, and ~ (3 ft) 14 AWG White High Temperature Wire Part #RPW086-2636
- Heater has flip-up tab to mount Overtemp Switch Part #PCT042-135
Fits: Chamber
Pelton Crane Recommends The Overheat Thermostat Part #PCT042-135 be replaced any time 1 or more heating elements are replaced.
Click Here To Learn How To Install The New Heating Element(s)
Tech Tip: Be sure your Pelton Crane OCR heating element is defective before replacing it, by performing the following test:
How To Test The Pelton Crane OCR Heating Elements
This test consists of measuring the amount of resistance in the element. To do this, first, turn the autoclave off and unplug it from the wall
WARNING: CURRENT MUST NOT BE PRESENT WHEN MEASURING RESISTANCE.
Set your volt/ohm meter on 200 ohms (200 NOT 200k). The ohms range is located within the Omega (Ω )(look for this symbol) section of your meter. It is also the area with "k" ranges (ie: 2000k,. 200k, 20K and then 2000, 200).
Place a probe from the volt/ohm meter on each terminal of the 2 terminals on the element (it really doesn't matter which color probe goes where)
While the center heating element is the most common to wear out, be sure to test all three
| For the heating element to be good, it must fall within the resistance range in this table (between 8.10 and 9.90 ohms) If your reading is outside of this range, then it is defective and needs to be replaced. |
| Model |
Volts |
Watts |
Amps |
Resistance |
Resistance Range |
| Pelton Crane OCR |
120v |
1600Watts |
13.333 amps |
~9.00 Ohms |
8.10 ↔ 9.90 ohms |
Autoclave Repair Tip
When Replacing a Fiber Heating Element on The OCR with the Newer Steel Jacketed Heating Element
Here is what you need to know
If the autoclave repair you are performing on your Pelton Crane OCR involves replacing the heating element, and the old heating element is made of a fiber material instead of encased in a steel jacket, you will need to make sure you remove the Copper Plate that is with the old element
To avoid confusion, note that the Copper Plate is not copper in color, nor is it the familiar green of copper as it weathers.
Instead, it will be black as shown in the picture below
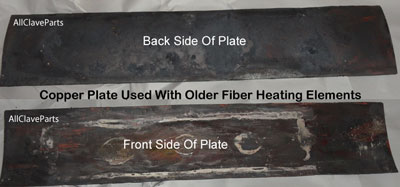
Failure to remove this Copper Plate will result in a short, so make sure you remove and discard it before installing the new heating element!
The finished sequence of parts are:
- The Stainless Steel Bands (looks like big hose clamps)
- The Steel Bracket that the Heating Element Rests On
- The Heating Element - Flat Against the Chamber


